The screenshots in this tutorial use Ubuntu 7.10 (which is no longer supported), but the same principles apply also to Ubuntu 8.04, 8.10, 9.04, and 9.10. Actually, you can install pretty much any Linux distribution this way.
Introduction
VirtualBox allows you to run an entire operating system inside another operating system. Please be aware that you should have a minimum of 512 MB of RAM. 1 GB of RAM or more is recommended.
Comparison to Dual-Boot
Many websites (including the one you're reading) have tutorials on setting up dual-boots between Windows and Ubuntu. A dual-boot allows you, at boot time, to decide which operating system you want to use. Installing Ubuntu on a virtual machine inside of Windows has a lot advantages over a dual-boot (but also a few disadvantages).
Advantages of virtual installation
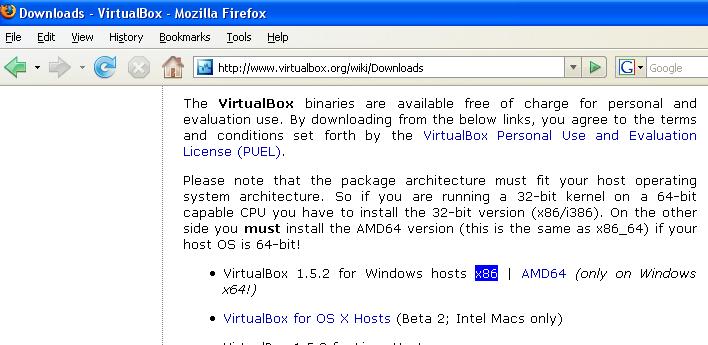
The first thing you have to do is obtain VirtualBox. Visit the VirtualBox website's download page.


Select the appropriate Windows download. In most cases, you should select x86. Use AMD64 only if you know you have a 64-bit processor.
Follow these instructions to get a Ubuntu disk image (.iso file). Your download should take quite a while, at least an hour on a broadband connection.


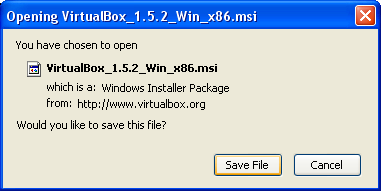
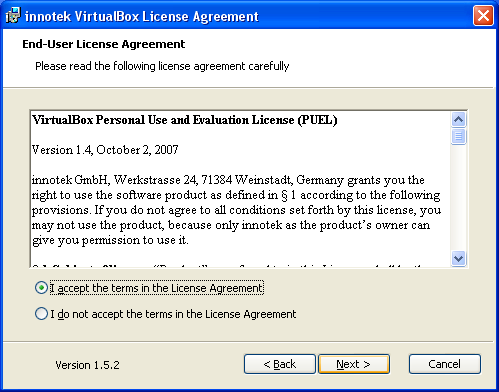
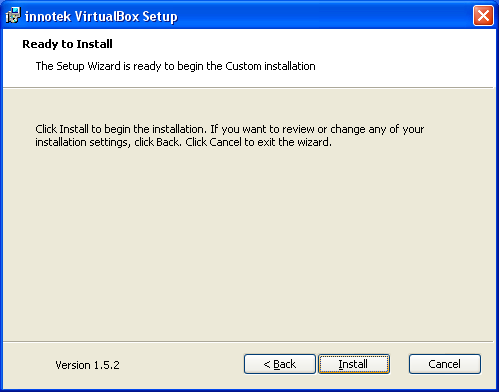
While waiting for Ubuntu to download, you can install VirtualBox. The setup is just like with most Windows software. Double-click the installation file you downloaded earlier. Then keep clicking through the installation wizard. The default answers should work fine.

Next, start up VirtualBox from the Start menu. If, for some reason, it doesn't show up in the menu, you can also find it in C:\Program Files\innotek VirtualBox\VirtualBox.exe

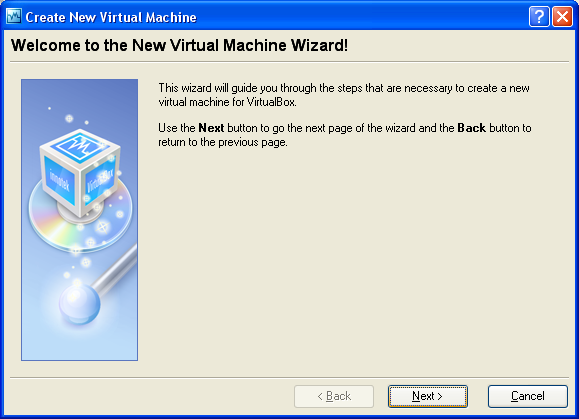
Click New to set up a new virtual machine profile.

Click Next

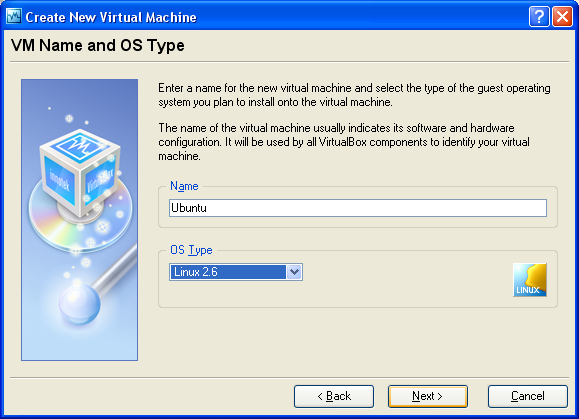
Title your virtual machine. Here I called it Ubuntu. The type of OS is probably Linux 2.6, but if you don't know the OS type, there is also an option for unknown.

VirtualBox will try to guess how much RAM to allocate for the virtual machine. Since my computer has 512 MB of RAM, it decided 256 MB would be good (I agree). If you have 1 GB of RAM, 512 MB might be a good allocation.

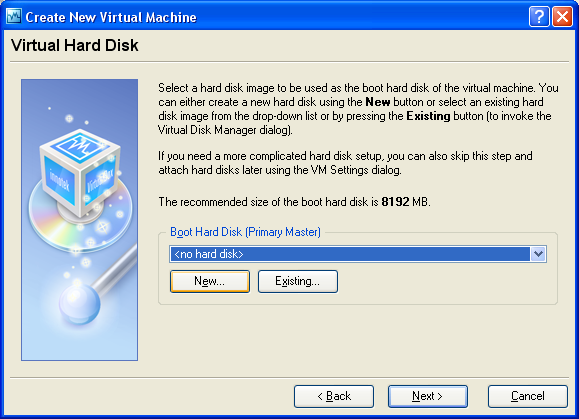
You probably don't have a virtual hard drive to install Ubuntu to, so go ahead and create a new one.


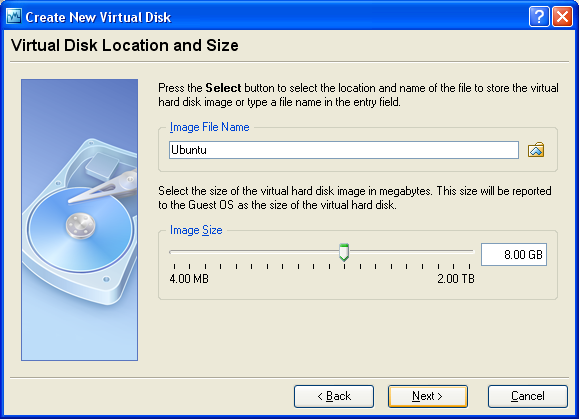
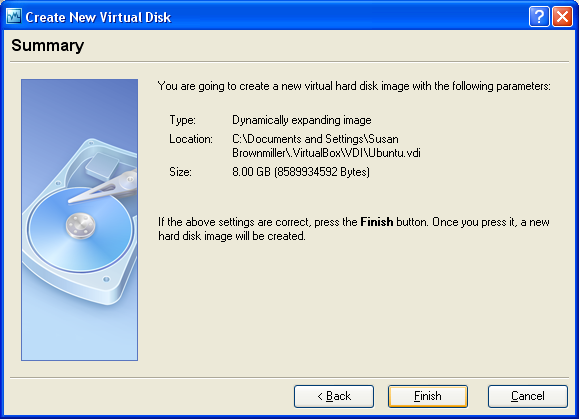
It doesn't hurt to go with the defaults for the virtual hard drive creation process.

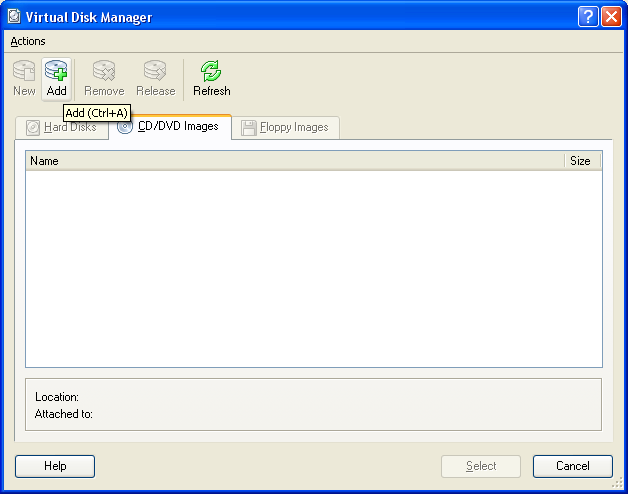
The next thing we want to do is click on the CD-ROM settings.


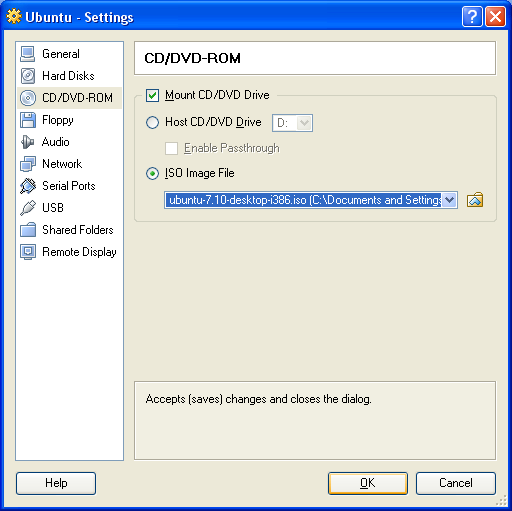
Add a CD to mount and select the .iso file you downloaded from the Ubuntu website.

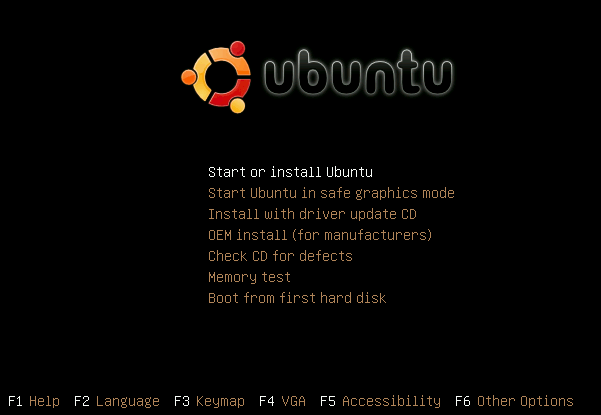
Now you're ready to get started! Select the newly created virtual machine profile and click Start.

Select Start or Install Ubuntu


After it boots up, click the Install icon on the desktop.


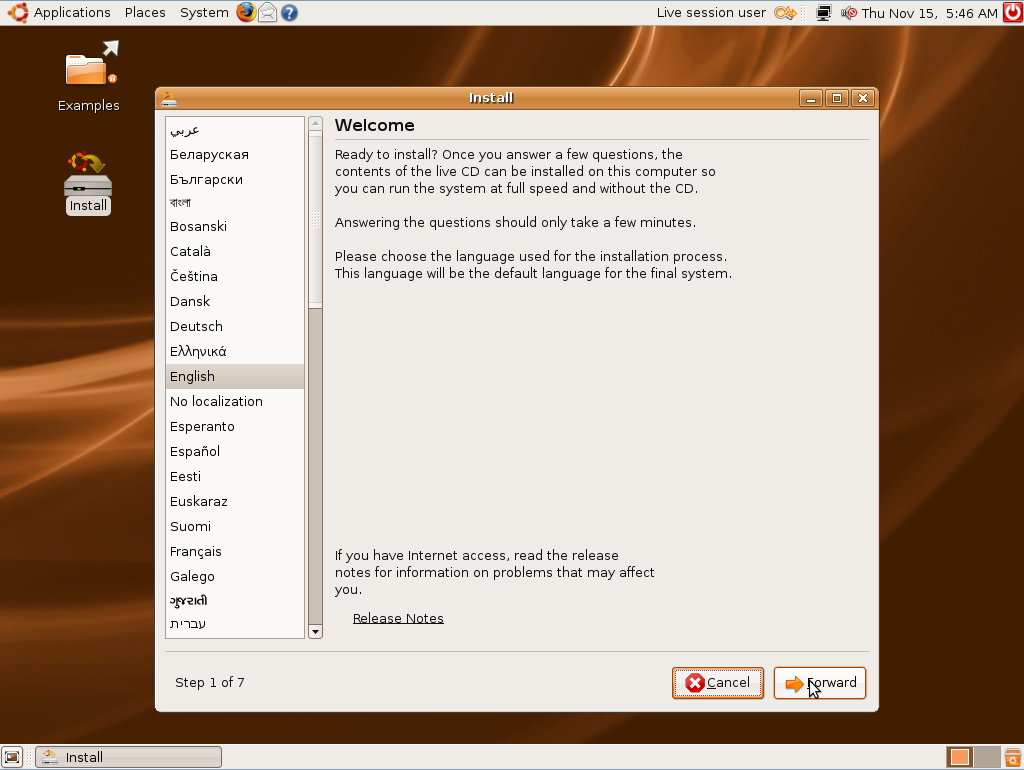
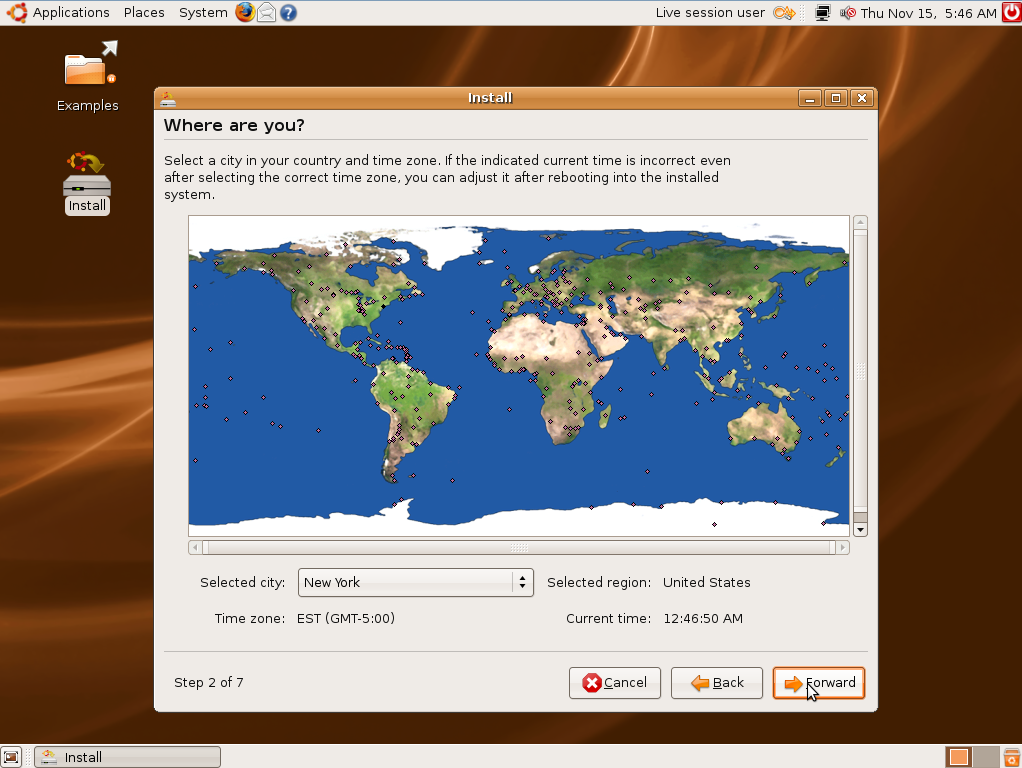
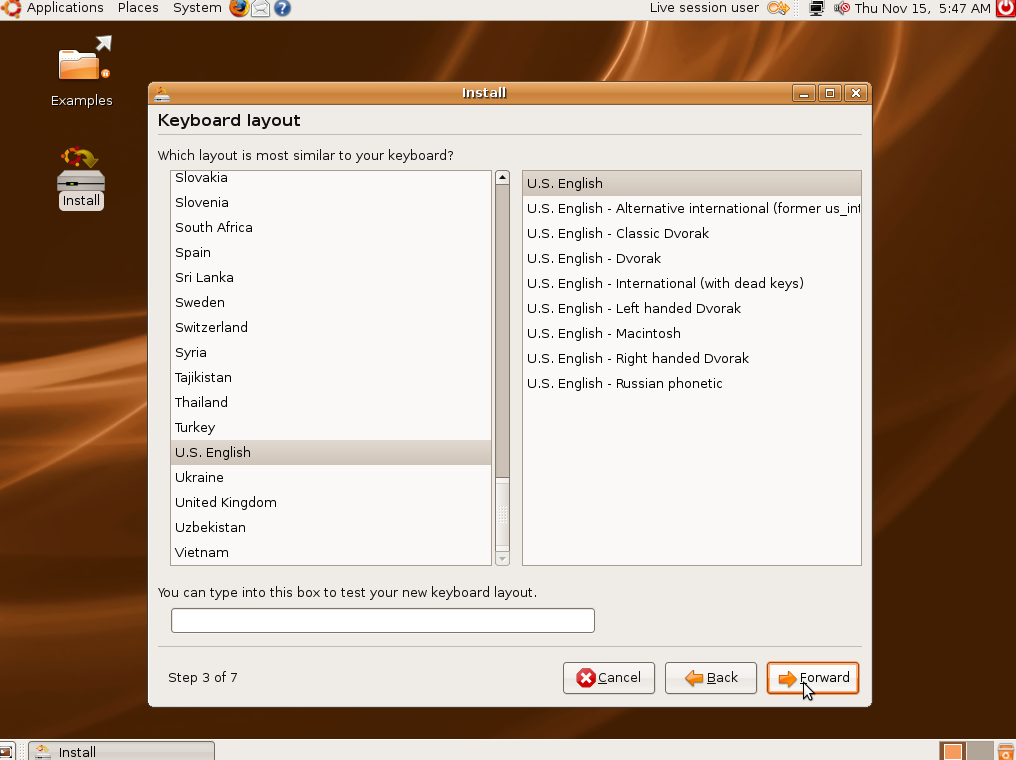
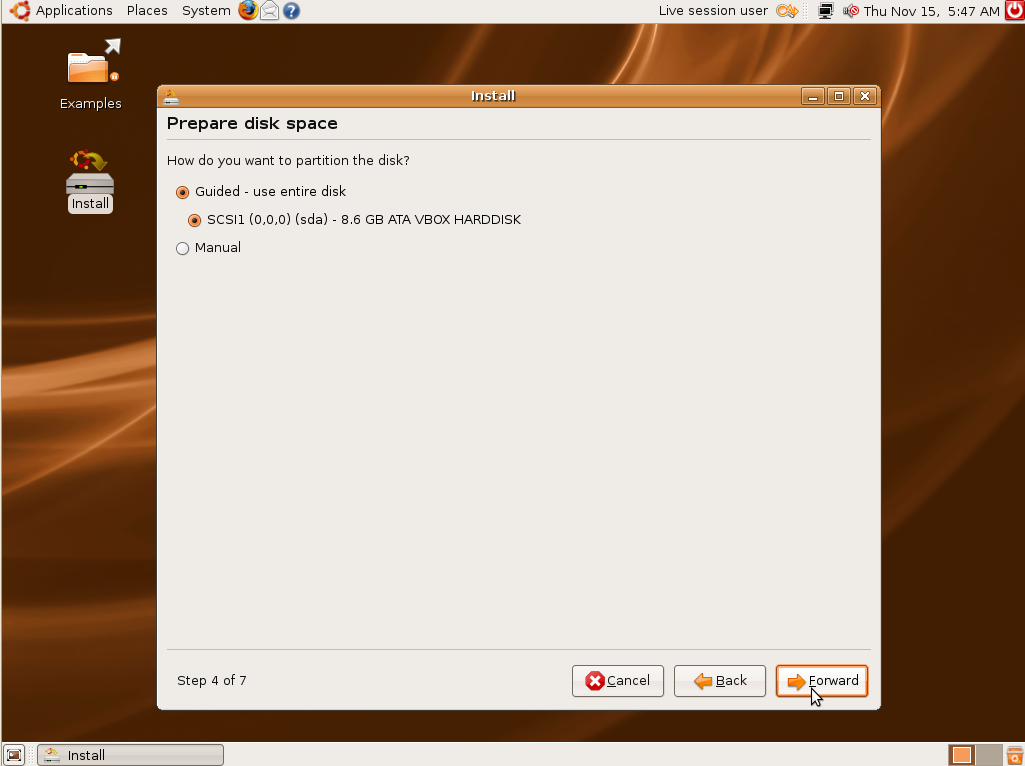
Answer all the questions. If you don't know the answer, just go with the defaults.

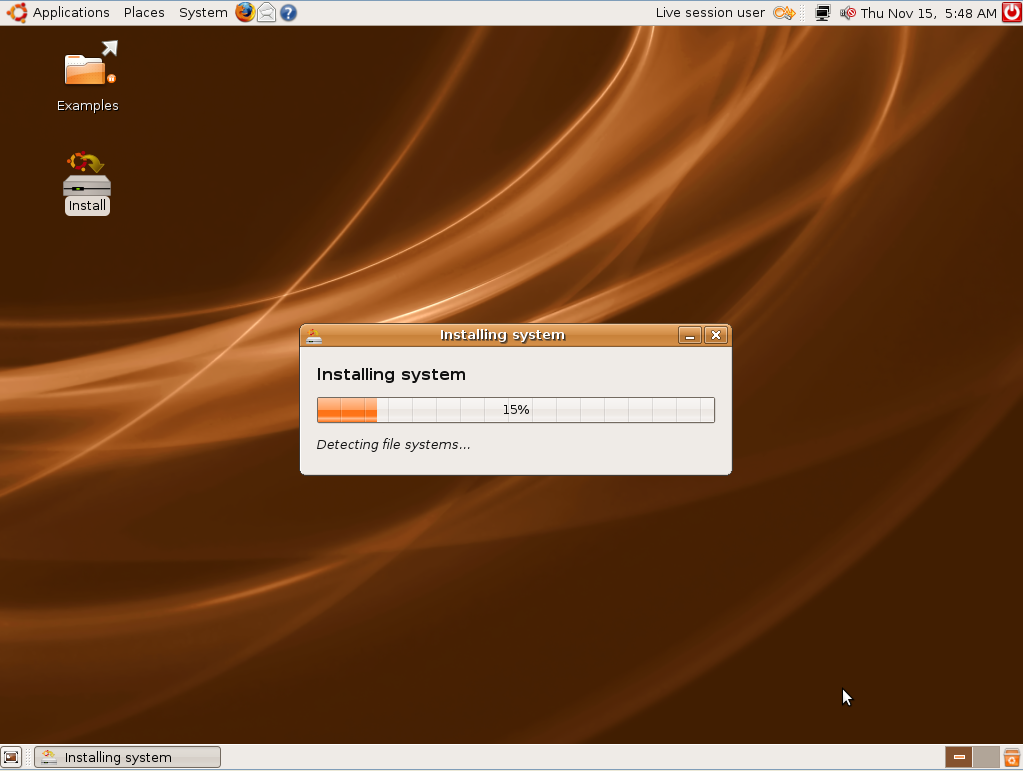
Wait for Ubuntu to install. This can take anywhere between fifteen minutes and an hour, depending on your computer's specifications.

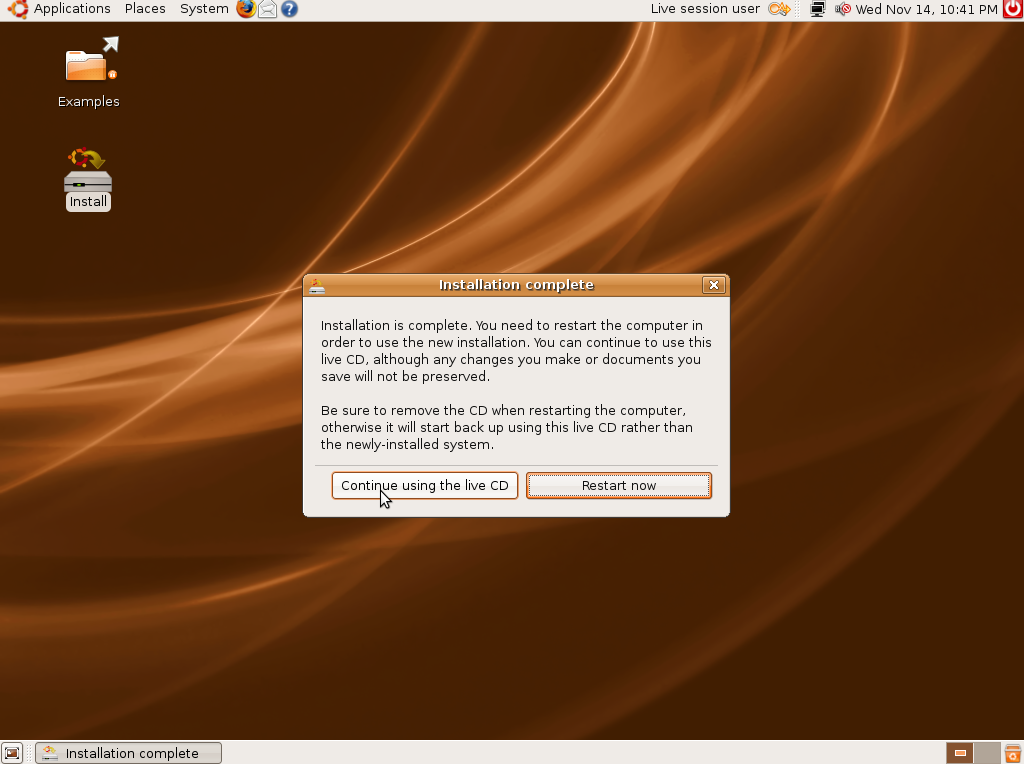
Instead of rebooting right away, choose to continue to use the "live" session.


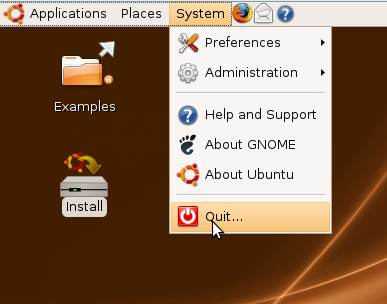
Then, go to System > Quit > Shut down to shut down your virtual machine.


After it has shut down, restart VirtualBox and change the CD-ROM settings so that you are no longer using the .iso you downloaded (you won't need it any more, now that you've installed Ubuntu).


This time, when Ubuntu boots up, you'll get a log in screen and can actually start using your installation!
From http://www.psychocats.net/ubuntu/virtualbox
In case anyone is interested in virtualization take a look at http://www.virtualbox.org/
Introduction
VirtualBox allows you to run an entire operating system inside another operating system. Please be aware that you should have a minimum of 512 MB of RAM. 1 GB of RAM or more is recommended.
Comparison to Dual-Boot
Many websites (including the one you're reading) have tutorials on setting up dual-boots between Windows and Ubuntu. A dual-boot allows you, at boot time, to decide which operating system you want to use. Installing Ubuntu on a virtual machine inside of Windows has a lot advantages over a dual-boot (but also a few disadvantages).
Advantages of virtual installation
- The size of the installation doesn't have to be predetermined. It can be a dynamically resized virtual hard drive.
- You do not need to reboot in order to switch between Ubuntu and Windows.
- The virtual machine will use your Windows internet connection, so you don't have to worry about Ubuntu not detecting your wireless card, if you have one.
- The virtual machine will set up its own video configuration, so you don't have to worry about installing proprietary graphics drivers to get a reasonable screen resolution.
- You always have Windows to fall back on in case there are any problems. All you have to do is press the right Control key instead of rebooting your entire computer.
- For troubleshooting purposes, you can easily take screenshots of any part of Ubuntu (including the boot menu or the login screen).
- It's low commitment. If you later decide you don't like Ubuntu, all you have to do is delete the virtual hard drive and uninstall VirtualBox.
- You don't have to burn a CD to install Ubuntu easily.
- In order to get any kind of decent performance, you need at least 512 MB of RAM, because you are running an entire operating system (Ubuntu) inside another entire operating system (Windows). The more memory, the better. I would recommend at least 1 GB of RAM.
- Even though the low commitment factor can seem like an advantage at first, if you later decide you want to switch to Ubuntu and ditch Windows completely, you cannot simply delete your Windows partition (as you would be able to in a dual-boot situation). You would have to find some way to migrate out your settings from the virtual machine and then install Ubuntu over Windows outside the virtual machine.
- Every time you want to use Ubuntu, you have to wait for two boot times (the time it takes to boot Windows, and then the time it takes to boot Ubuntu within Windows).
The first thing you have to do is obtain VirtualBox. Visit the VirtualBox website's download page.

Select the appropriate Windows download. In most cases, you should select x86. Use AMD64 only if you know you have a 64-bit processor.
Follow these instructions to get a Ubuntu disk image (.iso file). Your download should take quite a while, at least an hour on a broadband connection.


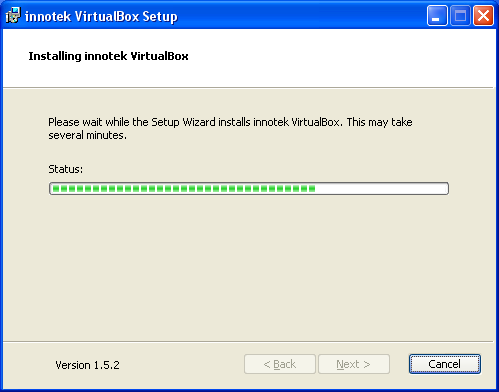
While waiting for Ubuntu to download, you can install VirtualBox. The setup is just like with most Windows software. Double-click the installation file you downloaded earlier. Then keep clicking through the installation wizard. The default answers should work fine.
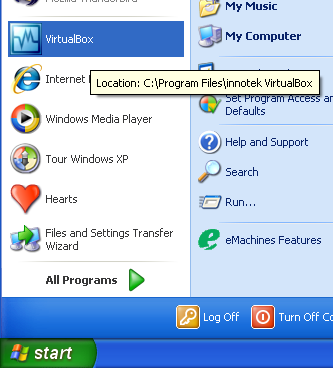
Next, start up VirtualBox from the Start menu. If, for some reason, it doesn't show up in the menu, you can also find it in C:\Program Files\innotek VirtualBox\VirtualBox.exe

Click New to set up a new virtual machine profile.
Click Next
Title your virtual machine. Here I called it Ubuntu. The type of OS is probably Linux 2.6, but if you don't know the OS type, there is also an option for unknown.

VirtualBox will try to guess how much RAM to allocate for the virtual machine. Since my computer has 512 MB of RAM, it decided 256 MB would be good (I agree). If you have 1 GB of RAM, 512 MB might be a good allocation.
You probably don't have a virtual hard drive to install Ubuntu to, so go ahead and create a new one.


It doesn't hurt to go with the defaults for the virtual hard drive creation process.

The next thing we want to do is click on the CD-ROM settings.


Add a CD to mount and select the .iso file you downloaded from the Ubuntu website.

Now you're ready to get started! Select the newly created virtual machine profile and click Start.
Select Start or Install Ubuntu


After it boots up, click the Install icon on the desktop.


Answer all the questions. If you don't know the answer, just go with the defaults.
Wait for Ubuntu to install. This can take anywhere between fifteen minutes and an hour, depending on your computer's specifications.
Instead of rebooting right away, choose to continue to use the "live" session.

Then, go to System > Quit > Shut down to shut down your virtual machine.


After it has shut down, restart VirtualBox and change the CD-ROM settings so that you are no longer using the .iso you downloaded (you won't need it any more, now that you've installed Ubuntu).


This time, when Ubuntu boots up, you'll get a log in screen and can actually start using your installation!
From http://www.psychocats.net/ubuntu/virtualbox
In case anyone is interested in virtualization take a look at http://www.virtualbox.org/
Please check with Manuals. Author is NOT responsible for any misinformation / incorrect information or typographical errors.
NOTE: If you would like to share any useful info, please mail to the authors.
